Padlet
Learn how faculty can integrate Padlet, an collaborative online pin board, into their Canvas courses
 Padlet for Collaboration and Sharing
Padlet is a collaborative online pin board that faculty can integrate into their courses to help students share content with each other. With Padlet, you can create a private space for students to share words, images, videos, and just about any other file type securely in a fun visual way.
Use Padlet Regularly?
If you are a faculty member who regularly uses Padlet and find yourself limited using a free Padlet account, reach out to CDLI for a free upgrade to Padlet Backpack, the CDLI-sponsored education account. Once you have your SU Padlet Backpack account, you will log-in at https://seattleu.padlet.org/.
Please note: the SU Padlet Backpack upgrade is for Seattle University faculty/staff only.
Questions About Padlet?
Please view the Padlet FAQs below but if you have any other questions about Padlet, please contact CDLI for any other questions or troubleshooting issues with Padlet.
Padlet FAQs
How do I create a Padlet?
You can either sign up for a free limited Padlet account (which only allows you to create 3 padlets) or you can email CDLI for a Padlet Pro account.
The instructions below assume you are using a Padlet Pro account. Please note that there are different privacy settings in a free Padlet account and a Padlet Pro account.
Look at these instructions carefully (especially the instructions on privacy settings) to make sure you have things set up correctly.
1. Once you have set up your Padlet account and signed in, choose Make a Padlet from your Padlet Dashboard.
2. That will open a selection of choices. Choose a format that you would like to use. (Note: you can change this later using the More button and Change Format.)
Padlet options include:
- Wall
- Pack content in a brick-like layout.
- Shelf
- Wall with sections.
- Canvas
- Scatter, group and connect content in any way.
- Timeline
- Place content along a horizontal line.
- Grid
- Arrange content in rows of boxes.
- Stream
- Streamline content in an easy to rea, top-to-bottom feed.
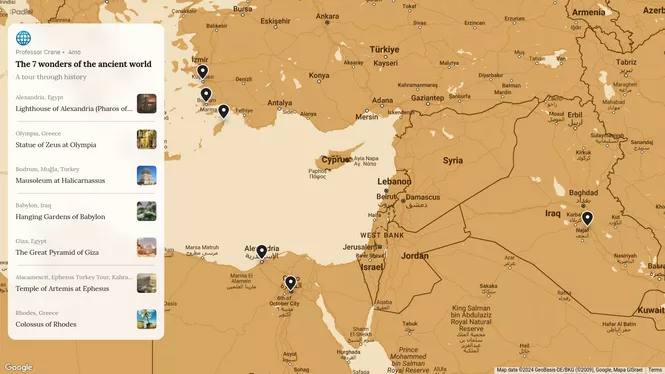
- Map
- Add content to points on a map.
You can also select an "Advanced" format to add sections to a timeline, grid, stream, or map.
3. Give your Padlet a relevant Title and Description and if you wish, select an Icon.
4. Configure your Padlet's visual appearance by selecting a Wallpaper (background). Padlet allows you to choose from a number of background types, including Solid Color, Gradients, Textures and Patterns, and Pictures. You can also upload a picture of your own as the background.
5. Configure Posting settings (including whether or not to display author name and timestamp above posts, whether or not to allow comments or reactions on posts).
6. Configure Content settings (including whether you wish to require moderator approval to post, whether or not you wish to filter out profanity, and if you wish to allow others to remake your Padlet).
7. Lastly, you can give your Padlet a custom URL if you wish.
Next, you'll need to modify your Padlet's security settings before you can embed your Padlet in Canvas (see the next item).
How do I configure my Padlet’s privacy settings?
In order to make your Padlet sharable and embeddable so that your students can add content to your Padlet, you'll need to configure your privacy settings correctly.
1. Click on the Share settings (the arrow button) to make sure your privacy settings are correct before getting an embed code.
2. By default, the privacy settings in Padlet Backpack are set to "Private" but you want to change that, so click on Change Privacy.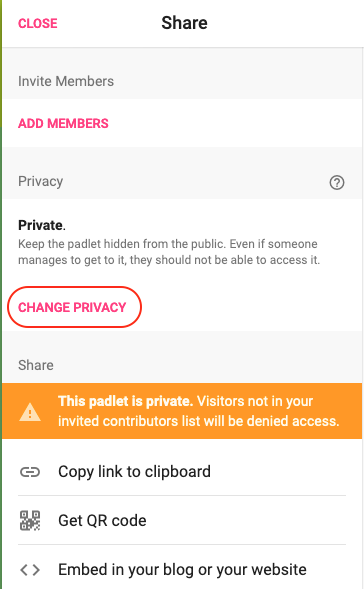
3. When the Change Privacy window opens, choose Secret, then for Visitor Permissions select Can Write and then hit Save.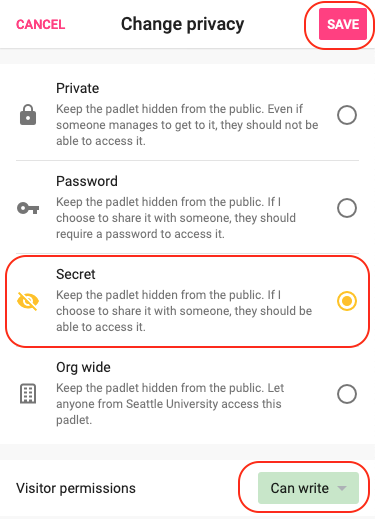
Now you are ready to get the embed code for your Padlet.
Other Optional Security Settings
We have not heard of any instances of "Padlet Bombing" but it doesn't mean it couldn't happen if the URL to your Padlet is shared. You could password protect the Padlet (under Change Privacy, select "Password" instead of "Secret") but the password could potentially be shared as well. If you are especially worried—and you will have to determine what is best for your group—you could set the Padlet to require that a moderator (you) approve a post before it appears. You can find that setting by clicking on the Modify (gear) icon, then under the heading "Content Filtering" select Require approval. If you require approval, then you must actively monitor and approve new posts as students add them to your Padlet.
How do I embed my Padlet in Canvas?
Before you embed your Padlet into Canvas, make sure you've configured your privacy settings correctly to enable your students to add content to your Padlet (see the item above).
1. Click Share:
2. Scroll down and select Embed in your blog or your website: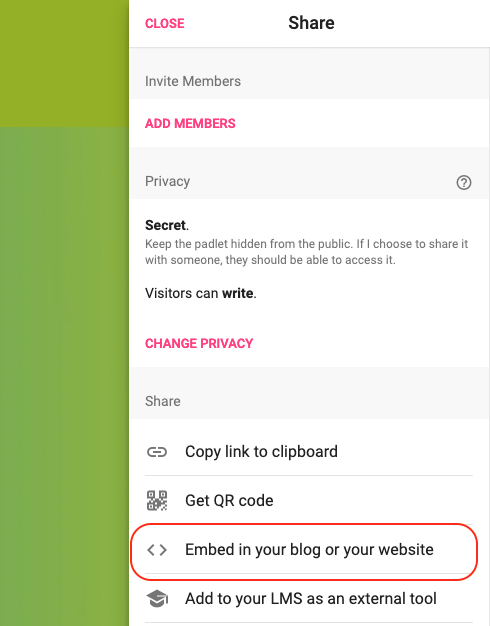
3. When the Embed this Padlet window opens, click on the Copy button to copy the embed code: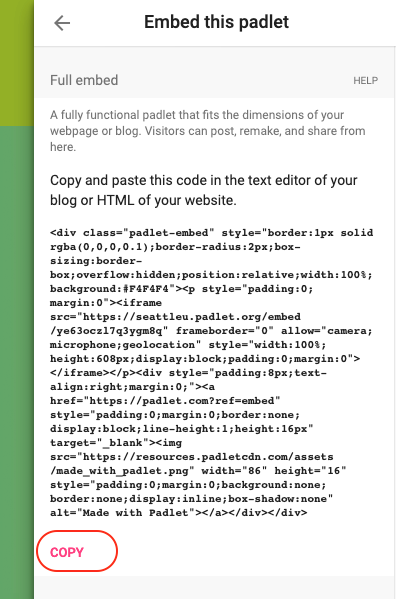
4. Next, go to your Canvas course and navigate to the page where you want to add your Padlet. Click on the page's Edit button in the upper right hand corner. Then in the rich content editor, 1.) Click on the Insert in the upper left row of the toolbar. Then choose Embed from the drop down menu.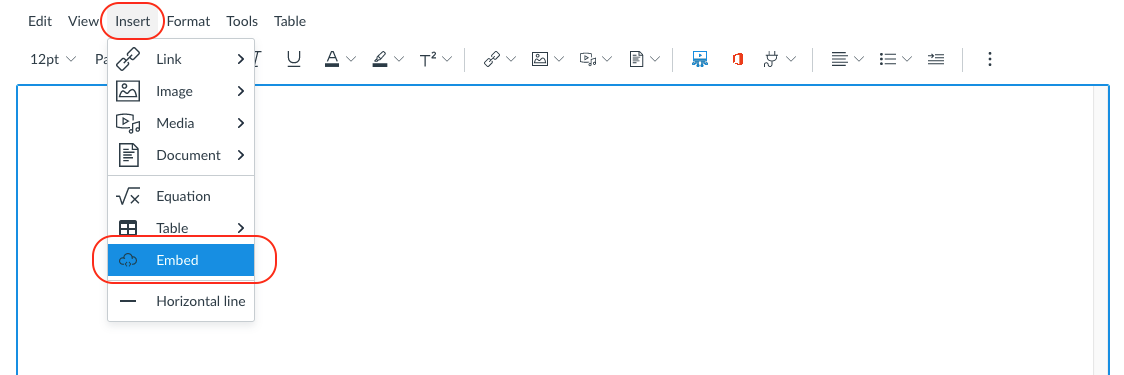
5. When the Embed window opens, paste the Padlet embed code into the box and click Submit. Make sure you also click Save on the page before you exit.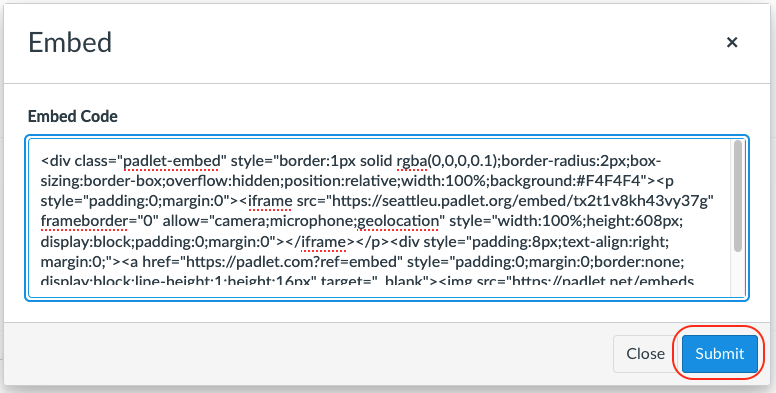
Now you are set to go and your students can interact with your Padlet directly by clicking on the pink Plus Sign in the bottom right hand corner of the Padlet window.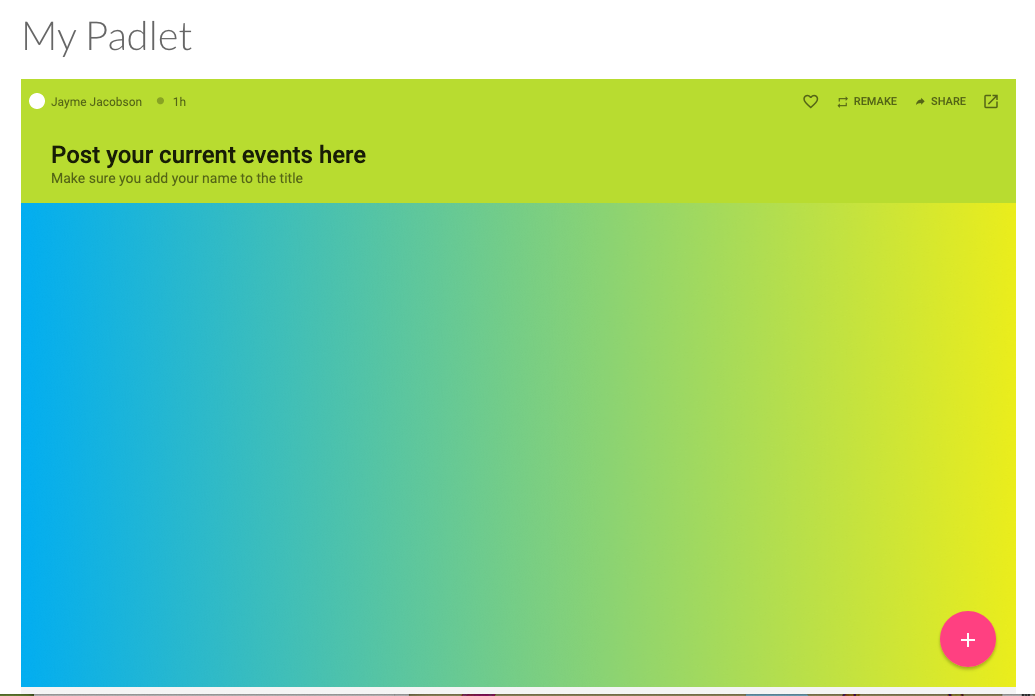
★ Please note: Any changes you make to your Padlet after embedding it in Canvas will be automatically updated. You don't have to re-embed.
How do I change my Padlet format?
After creating a Padlet, if you decide to switch to a different format, say from a Wall to a Shelf, click on the More icon (3 dots).
And this will open up a menu where you can select Change Format.
What if students have trouble adding content to Padlet in Canvas?
If your students report being unable to add content to your Padlet, first double check that your privacy settings are correct (see item on security settings above).
If your privacy settings on your Padlet are correct, please note that we have had some reports of students losing Padlet posts when they were using a Microsoft Surface or other device. This doesn't appear to happen except in cases where a Padlet is embedded on a page.
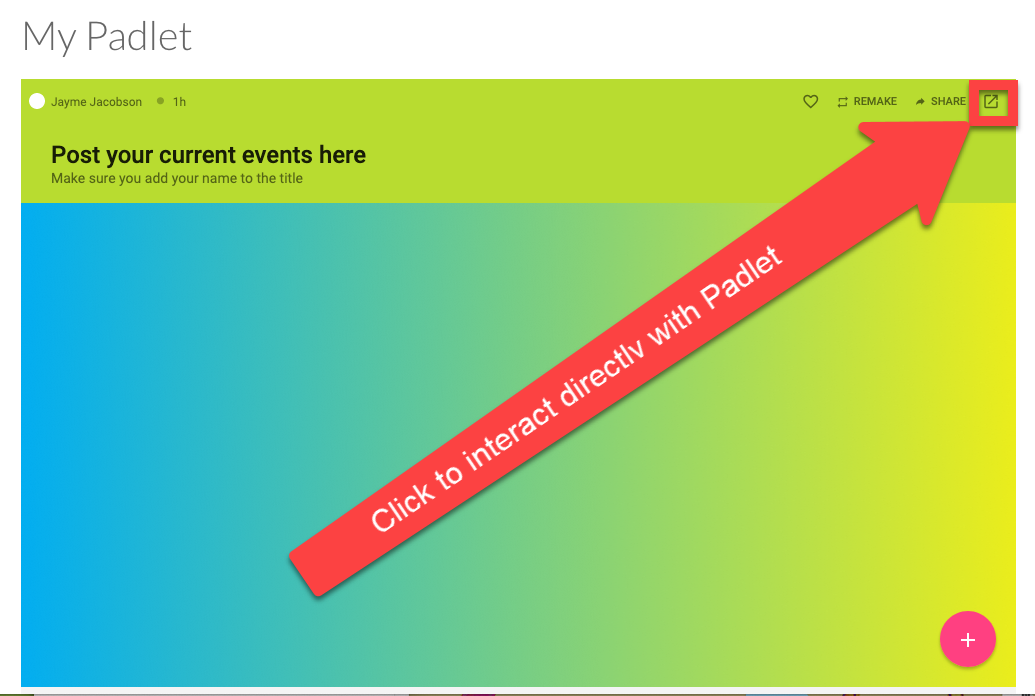
The solution is to encourage your students to always interact directly with Padlet and treat the embedded Padlet in Canvas as a viewing space only.
Here is some example language you can use and adapt. We suggest you put it at the top of the page where you have embedded your Padlet:
For this exercise, we will be posting to a Padlet board. The expanded view of our Padlet board is displayed below and is intended for viewing purposes only. To write on the Padlet, click on the arrow box in the upper right corner and then click the ‘Plus’ icon in the bottom right corner to type your entry.